Monday, December 9, 2013

HOW TO CREATE USER IN MYSQL STEP by STEP

Hello,

In this tutorial I will show you how you can create a user account in mysql and assign permission to that account according to your need.

1. Open up your command prompt

2. Inside CMD navigate to bin folder inside your mysql and type mysql

Now mySql stores all the user information in a database called mysql, so we will use this database to create a account

3. Type use mysql ;

Now Inside this database there is a table name user, we will use this table. If you want to take a look of this table type select * from user \G ;


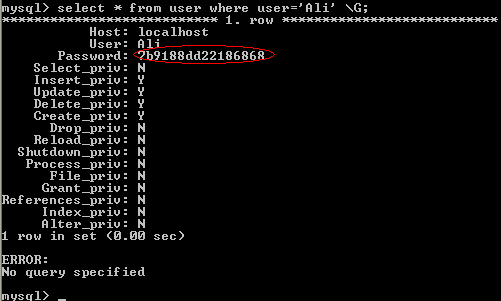
By using the above query you can see it list all the privileges you can set along with Host,User and Password

4. Now in order to create a user type the following query

insert into user (Host,User,Password,create_privs,delete_priv,update_priv,insert_priv) values ('localhost','Ali',Password("f00"),'Y','Y','Y','Y');

Now to describe the above query

As you can see I used 4 types of privileges and set them to yes, all the remaining privileges will set to No by default. You can specify fields according to your requirement.

Now for the password, I used a built in function name Password(), This function is use to decrypt our password, as you can see the below figure although our password is f00 but it is listed as a complex number

5. Last but not least, we have create the account but it is not active yet to make it active the following

 FLUSH PRIVILEGES;


This will change the update the privileges and you can use the newly created account.

If you have any further queries than please do comment.

Thanks 

Friday, December 6, 2013

How To Create a VPN Server Windows 7

To create a VPN Server just follow the steps

1. Goto Control Panel, and select network and sharing center


2. Now from the left menu, click on Change Adapter Settings


3. Now from file menu select New Incoming Connection (You must be a system administrator to perform this step)


4. Now from the newly opened window, select the users to whom you want to allow to access VPN Server (Your client will use these account to access the VPN), Click on Next
  • You can also add new user by clicking on Add someone button

 5. Now put checkmark on Through the Internet, Click on Next


6. Now select the protocol you want to use for the VPN Server. (It is recommended to leave all setting default)


7. Select Internet Protocol Version 4(TCP/IPv4), and click on properties

8. Select Specify IP Addresses 

9. Now enter the IP address range that your clients will use to access your internal network, click on OK


The IP network should match against your internal IP network

10. Now Finally click on Allow Access

If you want users to connect to this VPN Server through internet, than you would need to forward port 1723 to your IP Address

You can find more information about portforwarding on www.portforwarding.com
  • Your VPN Server is now ready for the clients to connect
  • Client can connect to your VPN by either using your computer Name or by using IP Address
I hope it was informative for you, and I would like to Thank you for reading

Port Forwarding On PTCL ZXDSL 831CII Modem

Port forwarding allows remote computers (for example, computers on the Internet) to connect to a specific computer or service within a private local-area network (LAN).

In this tutorial I will show you how to forward ports for Remote VPN.

In order to allow remote users to connect to VPN server a port 1723 must be forwarded.

This tutorial is specific for PTCL ZXDSL 831CII Modem, since different model/router have different option and GUI. But the concept will remain same

1. Open up your browser, and in the address bar type 192.168.1.1
  • You will be asked for User Id and Password just type admin for both options

2. Now from the top Menu click on Advance


3. From Left menu click on NAT


4. From the dropDown menu select PVC7
  • Afrer selecting click on Virtual Server


5. Rule Index : Total 16 rules for port forwarding can be added you can select any free index that is not being use by any other application

Application : Type a short description/name of application for which you are port forwarding

Start Port Number : Enter starting range for port to include in this rule

End Port Number : Enter the end range for port to include in this rule

Local IP Address : Type the IP Address of the PC for which your VPN server is installed

6. Finally Click on Save

You are done you have successfully forward yout ports for VPN server

I hope it was informative for you, and I would like to Thank you for reading.

How to Create A VPN Client Windows 7

To Create a VPN Client Follow the simple Steps

1. Goto Control Panel and select Network and Sharing Center

2. Now Select Set up a new connection or Network


3. Select connect to a workplace, and click on Next


4. Select Use my Internet Connection (VPN)


5. In internet Address type the IP or Domain name address of your VPN Server, click on Next
  • You can assign a unique name for this connection in Destination Name


6. Enter the username and password that will be use to connect to VPN Server. (VPN Server Administrator will provide you this information)


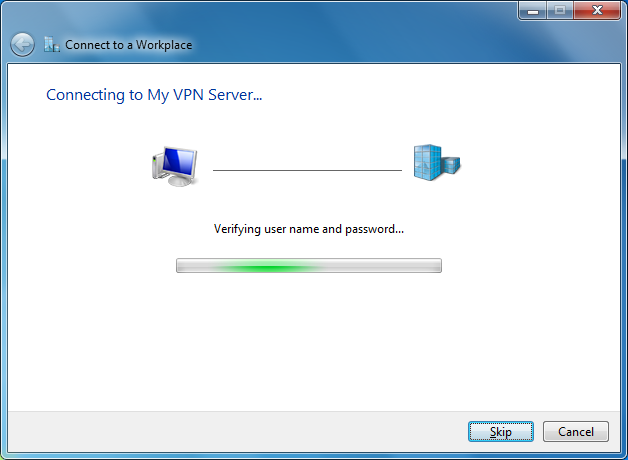
7. Now finally click on Connect


Thats it you will be connected to your VPN

I hope it was informative for you, and I would like to Thank you for reading.

Thursday, December 5, 2013

ORA-28000 - HOW TO UNLOCK ACCOUNT IN ORACLE

Hello,
   while connecting to oracle other than sysdba you might have encounter an error something like below

ORA-28000: the account is locked


this is because when we install oracle by default all accounts are locked except for sysdba and system account. Now in order to use the locked account, we will first have to unlock it.

ok so in order to unlock the account, you must be connected to oracle you can use either sysdba or system account which are by default unlocked.

1. In SQLPlus type conn / as sysdba, than hit enter now it will ask you for password by default the password is set to sysdba you can simply hit enter or you could type the password both are acceptable.

2. Now type alter user scott account unlock;

Now even though the account is unlocked, but we still cannot use it to connect to oracle, why because we will need to assign a password to this account.

3. type alter user scott identified by tiger;


We have successfully unlock the account "scott" and set it's password to "tiger"

If you have any further queries than please do comment.